When I moved into my house, I decided that I would try to bake all my own bread. I had been casually baking bread for a couple years and I wanted to force myself to develop those skills. I’ve been in the house for several months now, and with the exception of a single loaf I bought to cover the first few days before I could bake, I have in fact made all of my bread. It’s been a long, but very rewarding road thus far.
A lot of people these days are on ‘low carb’ or no carb diets that seem to villainize bread. To my mind though, every culture around the world has been built on bread for centuries and I see no reason to turn my back on it now. I would argue that the bread of history bares little resemblance to the wonderful ‘bread’ most of America buys today. Bread’s journey from dense brown slabs filled with nutrition but unpleasant to eat and into the cloud like mass devoid almost any nutritive benefit that most people buy today is actually quite interesting, at least to the bread lover. You’ll be happy to know, however, that it isn’t something I’m going to get into… today. Suffice to say that delicious and easy to eat bread packed with wholesome ingredients you’re body will thank you for is available today if you look for it. It’s also becoming easier for the home baker to make, thanks to some really excellent bread books and the power of the internet.
My end goal in bread making to be able to produce several styles of bread consistently. This loaf is the building block for the others. This loaf has been teaching me a lot about the use of a sourdough starter, the benefits of kneading, and the use of time to produce great bread. Make no mistake about it, this is not a super healthy loaf. It’s simple, and it’s delicious, but it’s still ‘white’ bread. As I gain confidence in baking I will be using my lessons here to branch out until I can create the tasty, whole grain loaf of my dreams!
Ok, enough blathering on… down to the dough!
This recipe comes from ‘Bread: River Cottage Handbook No.3’ and can be purchased on Amazon for about $20. It’s called ‘My Sourdough’ in the book and could not be simpler.
The first part happens the night before. Just mix it up and leave it out all night in a covered bowl.
Sponge:
650ml Warm Water
500g Strong White bread Flour
A ladleful of sourdough starter
The next day the sponge should look bubbly. Mine usually has some bigger bubbles like you would see on a pancake just before the first flip as well as a bit of foam on top. I usually mix it up before bed on a Saturday and I don’t come back to it until mid-day on Sunday.
This is where the magic starts to happen. By magic, I mean what you do now will define your final loaf. For the first dozen or so times I made this loaf it was changes made at this point that have taught me so much. My current method differs slightly from Daniel’s (the author) but works well for me. He is a great baker though and I a humble amateur.
I pour my sponge into the stand mixer and, with the dough hook installed, I start the machine on low speed. While that starts mixing I measure out the remaining flour and salt into a bowl and mix them together.
For the final dough, add to the sponge:
600g Strong White Bread Flour
(plus extra for dusting)
25g salt
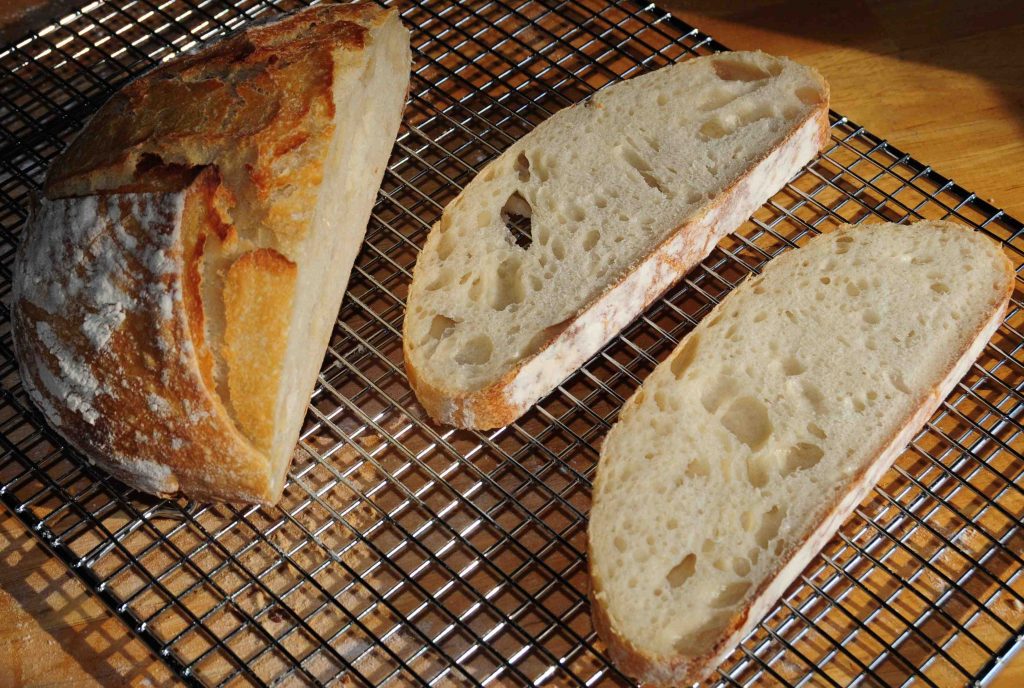
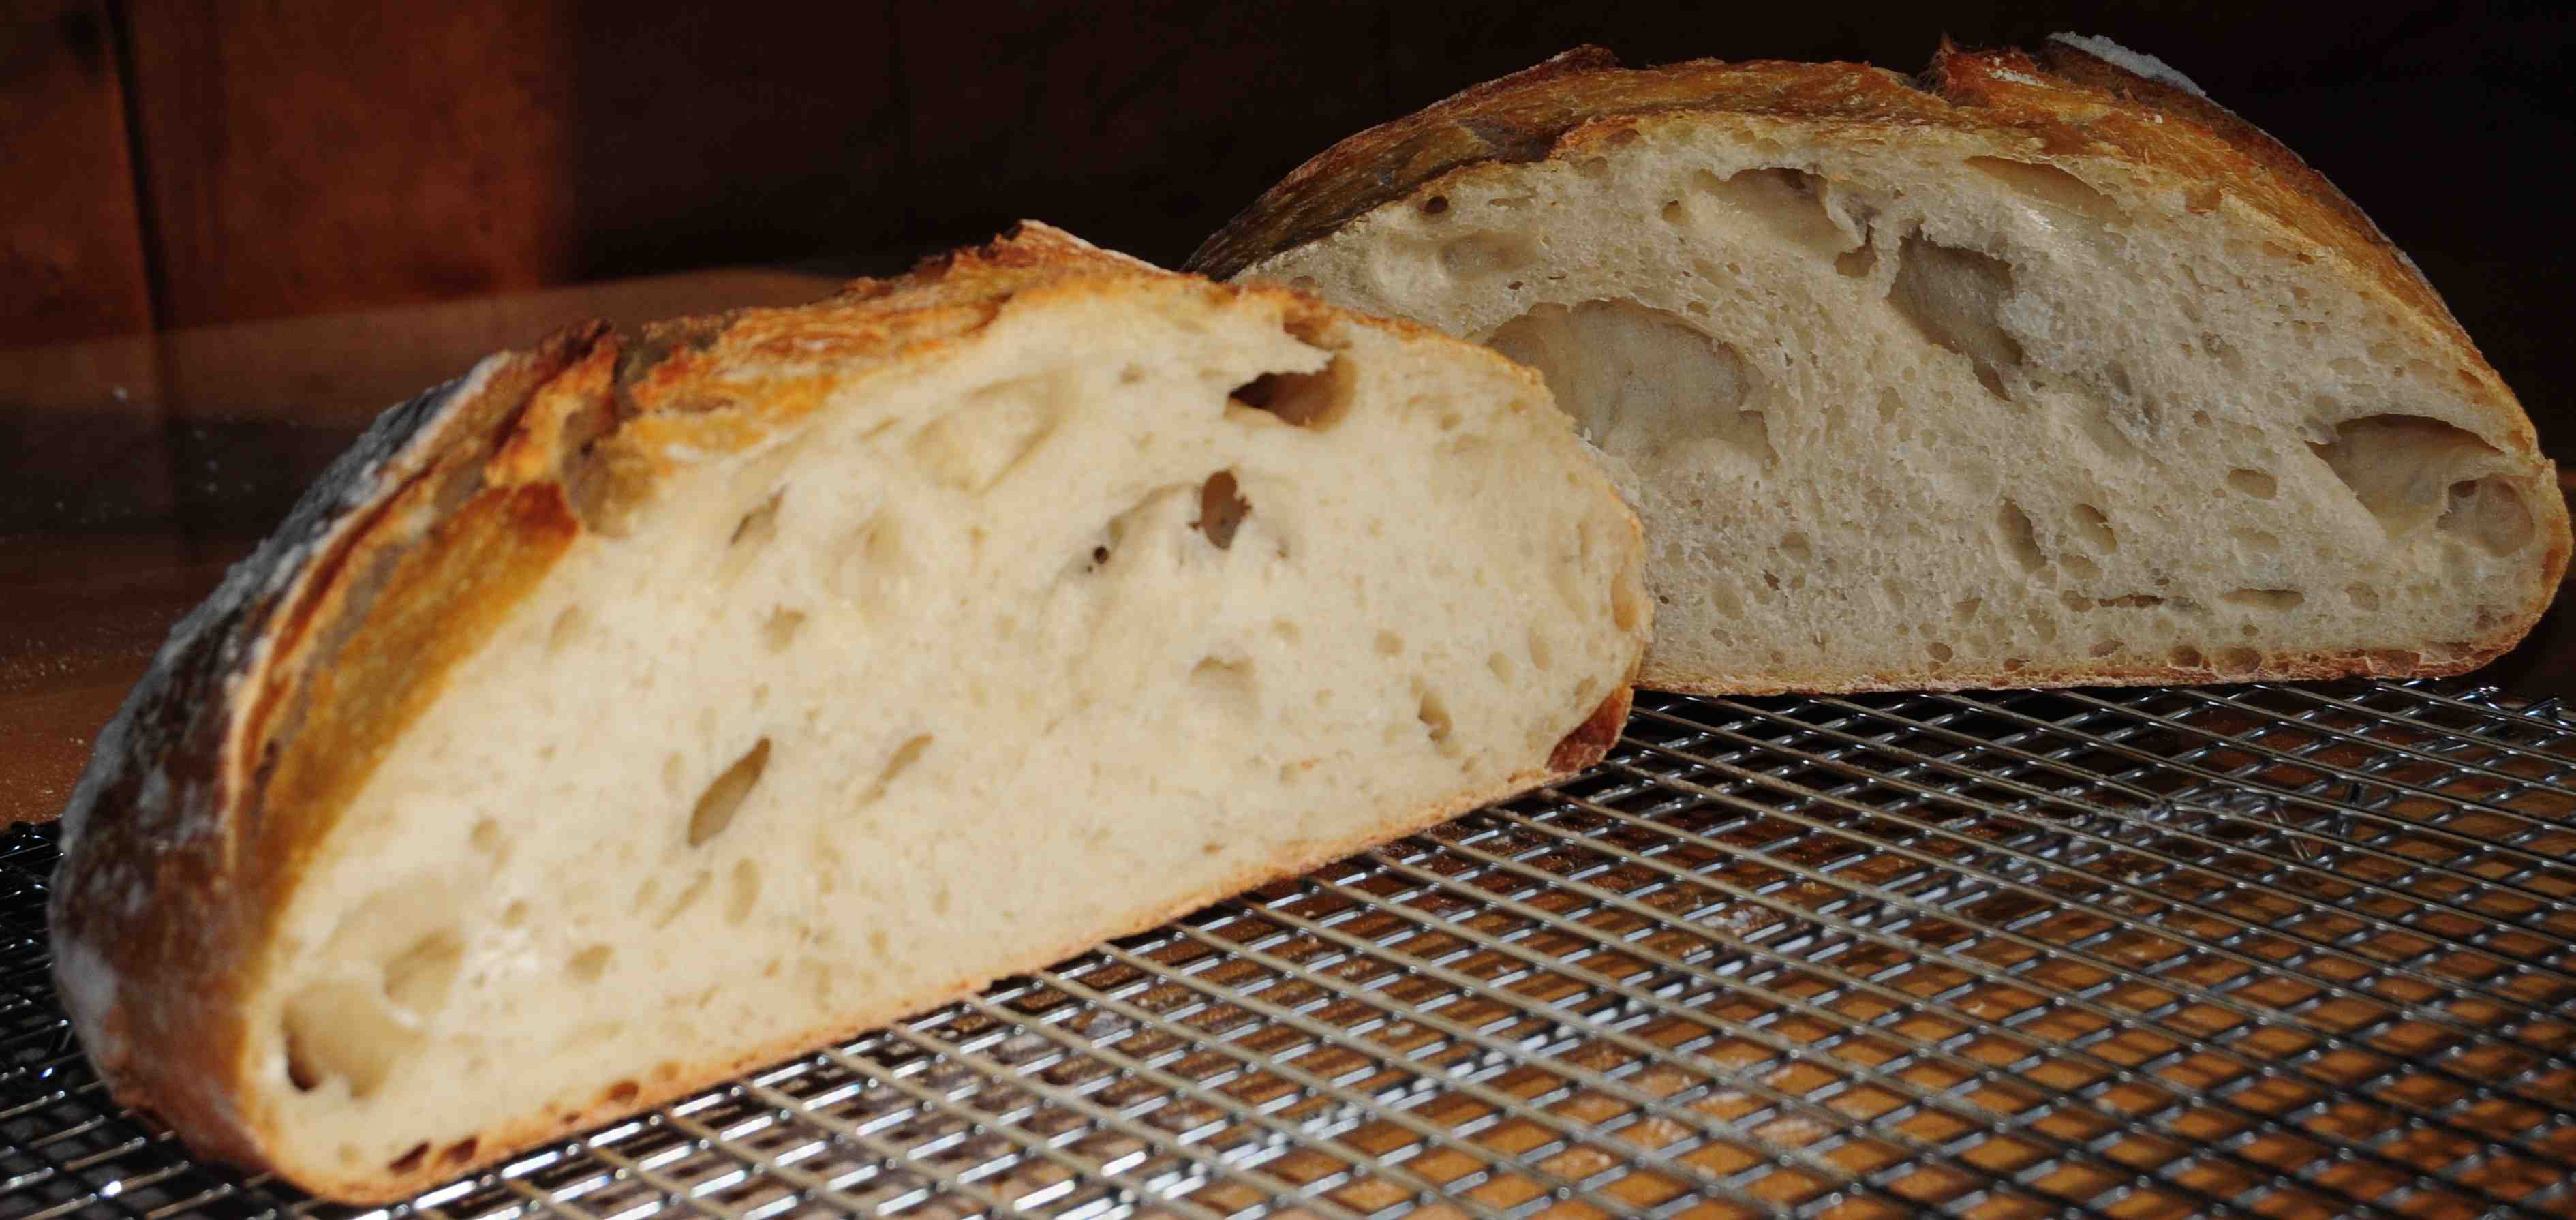
While the stand mixer whirs away I add the salt/flour mixture to it, literally, a tablespoon at at time. This takes quite some time and when I’m about 2/3s through adding the flour my mixer becomes overwhelmed. During this period where I’m adding flour the stand mixer is doing a lot of work developing the gluten in the final dough. Once the mixer can’t handle the dough I dump it out and knead by hand until all of the flour has been worked in. Since the stand mixer was used to do most of the hard work all you need to do by hand is knead in the rest of the flour until the dough is smooth. You can continue to knead longer if you want to but try to resist the urge to keep adding more flour. The dough is supposed to be on the wet side. It will stick to you and anything you put it on but if you keep it moving you should be Ok. The combination of the kneading and wet dough will reward you with large bubbles in the final loaf.
Once you’re done kneading, put the dough in a bowl or whatever you use to proof your dough and let it rise for two hours. I like to poke at it and sort of flip it over once every 45 minutes or so. I just us a scraper or some floured hands. You don’t want to ‘punch it down’, which I think is the wrong image. You want to help distribute the heat in the dough to allow for an even rise. You will deflate some bubbles but try to avoid that.
For rising, I usually set my oven to warm with a baking stone on the lowest rack for about 10 minutes and then switch it off when I put the proofing dough in. The warmth helps with the rise but if it’s too warm.. it will bake. Keep it loosely covered to keep the moisture in. I put the dough in it’s container on a rack above the rack with the stone, not directly on it.
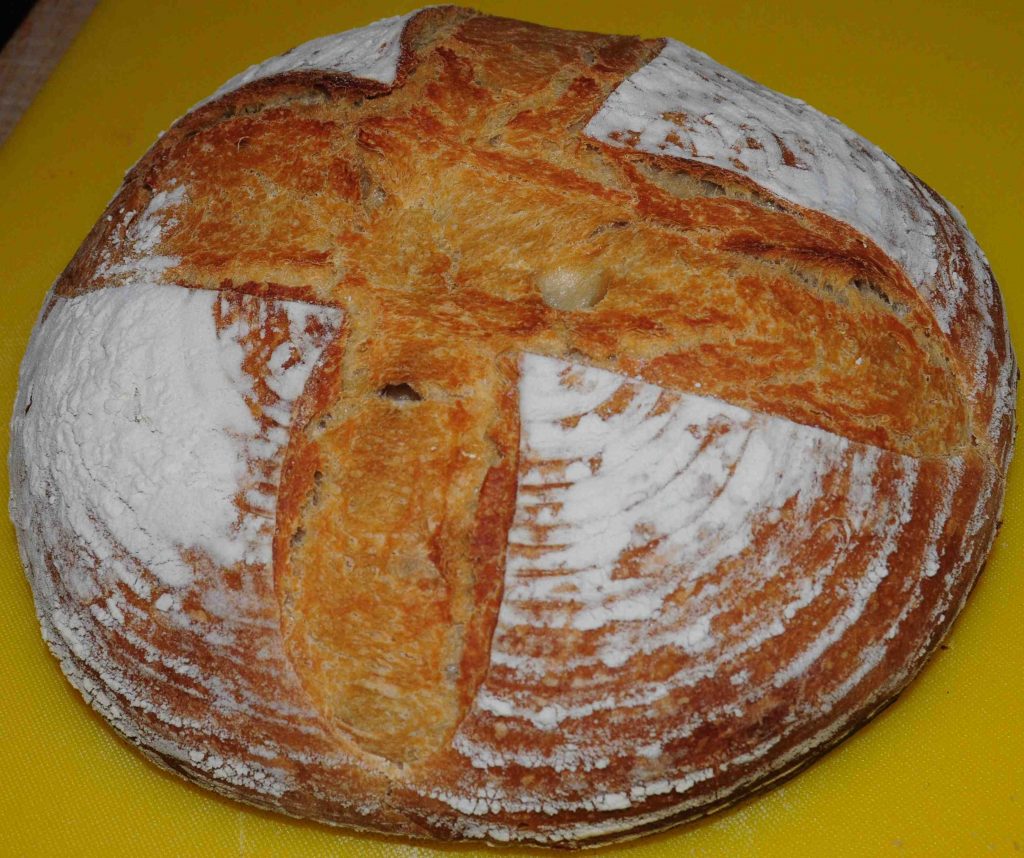
Once the two hours are up, I dump the dough back out onto my table and start shaping. I like to make boules with the dough, round loaves. I split the dough in half and shape the two halves into rounds and I then place them, upside down, into a brotform (or banneton). Well, actually, I only have one brotform so the other loaf gets shaped and placed on a cookie sheet on top of a piece of parchment, right side up, of course. Brotforms are great, but they aren’t cheap. I let them rise, under a moist towel, for 45 minutes to an hour and then I preheat my oven to 450 (Do not let the towel touch the bread. It will stick and rip a chunk off).
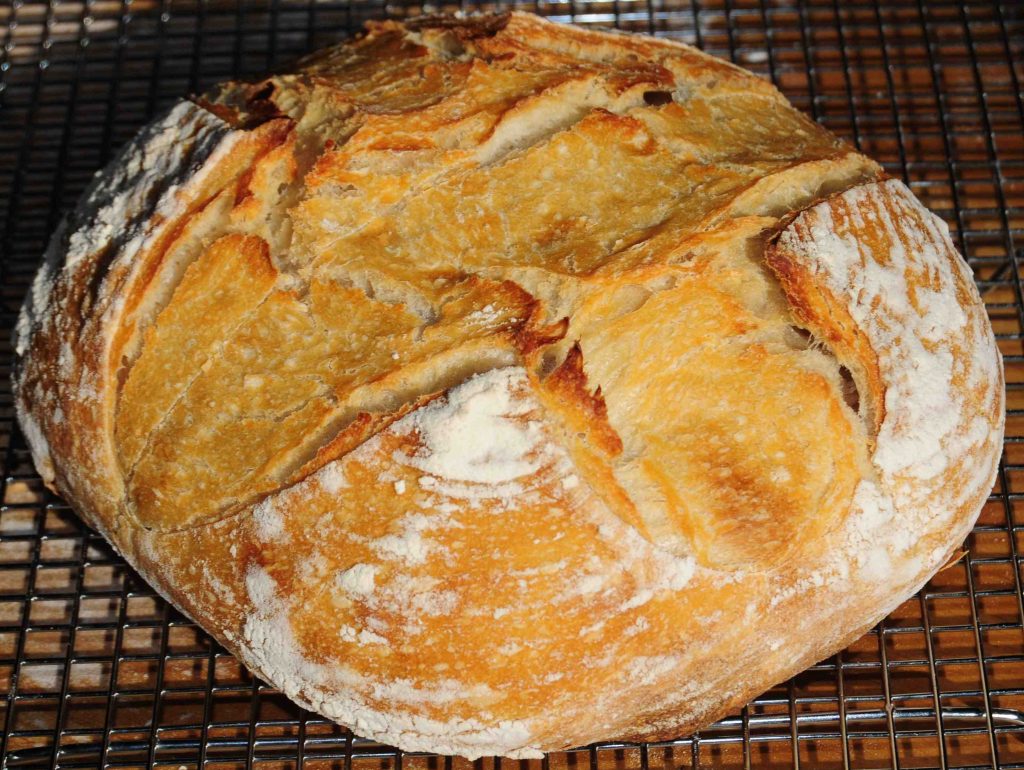
Once the oven is warm I slash the tops in an X pattern and bake them one at a time for something like 40 minutes. When I put the first loaf in, I lower the temp down to 425. When they look golden and tasty.. they are done; a tap on the base confirms with the ‘hollow’ sound.
I also own a Cloche, an earthenware covered baker, and I usually bake the loaf risen in the brotform in that. I have too much trouble moving the loaf on parchment into the cloche to justify it. I used to preheat the cloche but by adding the loaf to the cold cloche, it seems to boost my oven spring as it slows down the heat killing off the yeast.
I’ve used this process for my past two loaves and it’s working out really well, finally. Once the bread is baked I let it cool over night and then I split them in half, and freeze them in zip top bags. Defrosted bread, even more than a month later, has the same texture as when it went into the freezer. It’s pretty amazing. I keep a 1/2 loaf on the counter, in a plastic bag, for eating and defrost more as needed.
Robert
You should post more stuff!